Atlantis: The Silent School is a Tier 5 Alert in Atlantis released in November 2018.
Access to Atlantis: The Silent School requires a Combat Rating of 210. It rewards Source Marks.
Story[]
Enter the mysterious Silent School with Aqualad and King Shark and find the Trident of Poseidon!
Characters[]
|
|
|
The Combat Rating of the enemies is 258 for the episode and 243 for the event.
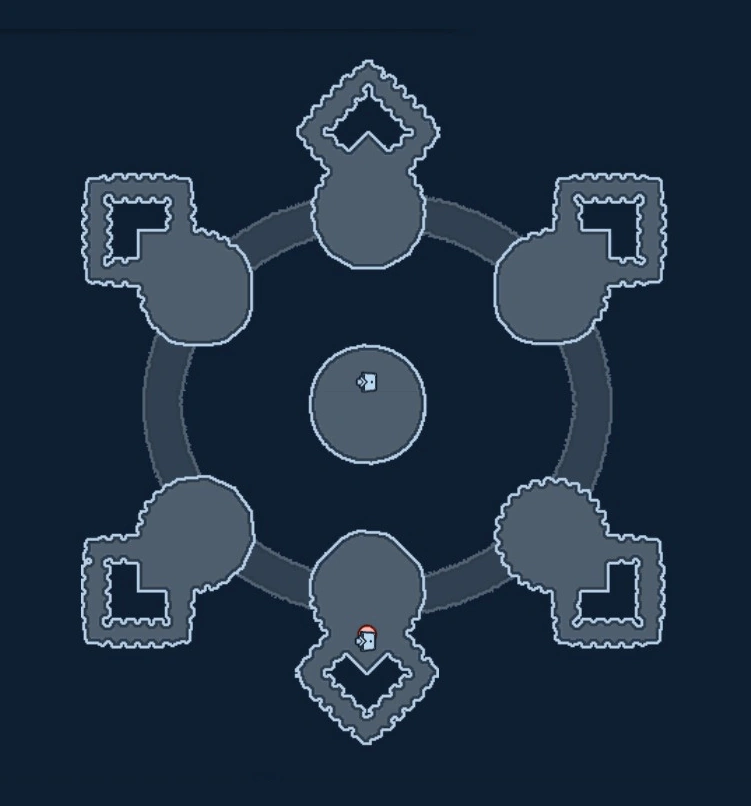
Map[]
Walkthrough[]
Talk to Aqualad and take out the first room of Silent School Acolytes. Aqualad and King Shark will go off on their own route, leaving you to traverse the Silent School on your own.
For the first part of the instance, you have to go through several rooms, and they are random. There are also rooms consisting only of mobs for you to take out like in the first room; it is possible to get themed room but not having to do the themed challenge but only have to take out the mobs. You seem to get 2 random challenge rooms and 2 rooms with only mobs in a run.
Gemini[]
Four coloured portals spawn Eyes of the Gemini that attack you (along with 2 untargetable Zodiac mages). You must interact with each portal to close them. It seems that you will get burned if your role doesn't match the portal color.
Blue: controller, green: healer, yellow: tank, red: damage
The red portal in the center can only be closed after the yellow, green, and blues ones are close.
Cancer[]
You face the Crustacean Guardian. All players are turned into Brine Hatchlings with 3 abilities:
- A biting basic attack
- Taunt: Causes the Crustacean Guardian to follow you.
- Cleansing Spray: Heals yourself.
In the first phase of the fight you must first interact with the mage (makes you snap at his ankles, distracting him), then the artifact in the center of the room.
You must push the right moonstone in the right shark statue's mouth by moving against it. There will be 3 moonstones, two are fakes but there doesn't seem anyway to tell other than trial and error (once an incorrect moonstone is used it turns into a stone ball so it is easy to tell apart).
The Crustacean Guardian only has one attack in this phase - a stomp Lethal attack that deals 25000 damage with massive knockback. Your Cleansing Spray can heal some 30000 health but it is a pretty long cooldown. However, the Crustacean Guardian moves slowly so as long as you keep moving he would have a hard time hitting you (a player should use Taunt to lure it away from other players attempting to put the moonstone in the right place). Gongs near the walls can also stun the Guardian temporarily.
After you succeed in placing the moonstone, you are turned back to normal and fight the Crustacean Guardian as normal.
Pisces[]
The pillar in the center of the room is surrounded by 8 statues: 4 eel statues and 4 shark statues interspersed with each other.
Eel statues zaps you with lightning that can bounce to other players if you stand in front of them too long (Lethal attack warned).
Each of the 4 shark statues will always be in one of 4 different states, in clockwise order:
- Inactive (and therefore safe to stand in front of)
- Spewing red Acidic Chum that deals damage over time (but also weakens the Living Statues that attack you, if you lure them into it)
- Emitting a white Water Spray that pushes you away
- Emitting a white Wind Vortex that pulls you in and then biting you
The 4 statues will rotate in states clockwise. The Wind Vortex statue will start using Water Spray, the one using Water Spray will start using Acidic Chum, the one using Acidic Chum will go inactive, and the inactive one will start using Wind Vortex. There is a timer in the center of the pillar indicating this (timer starts when the statues pause in creating hazards, and ends before they restart with a new hazard).
If you want to avoid those hazards, basically follow the red Acidic Chum clockwise around the room because whenever you see it from a statue, the next rotation that statue will be inactive.
Aries[]
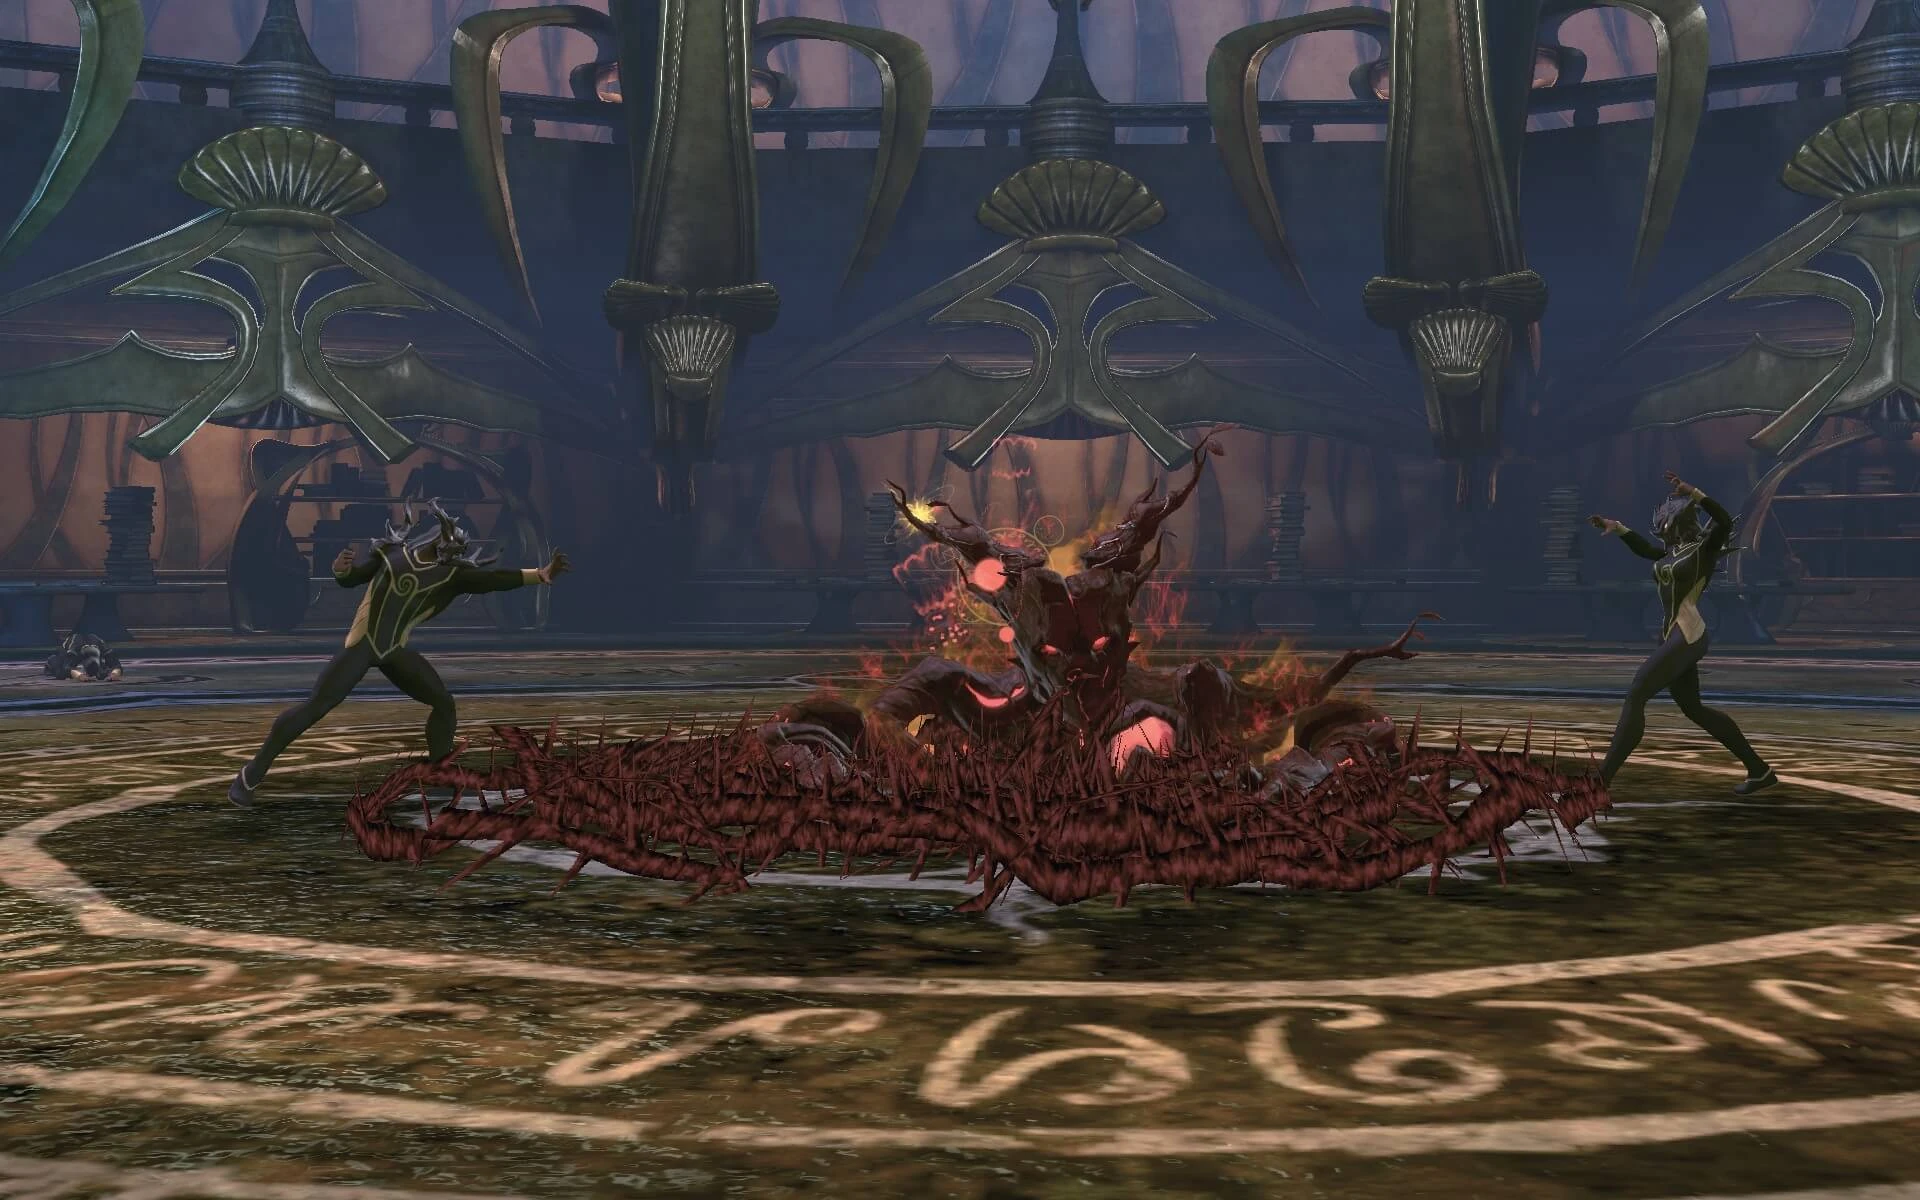
Barnunculous is the boss of this room. It is invulnerable at the beginning. You must defeat Barnacle Golems spawns in the room, pick up the crystals they drop, then smash it into the central crystal in the room, with the boss taking more damage with each crystal until you deal full damage. Barnunculous does a lot of damage with his ranged and melee attacks, and has a Lethal attack in which it rolls up into a ball and charges, dealing massive damage that could one-hit KO players.
Crown of Thorns Golem[]
Mechanics:
- Seismic Emission: The boss may look around and prepare to change phase (usually before the vine/shield phase). Players in close range of the boss will take moderate/considerable damage and may be knocked back.
- The Crown of Thorns Golem will occasionally shield itself from all attacks and summon 2-4 Crown of Thorns Vine adds, which must be KO'ed to make the Golem targetable again. These vines may Swipe (or Primary Attack) nearby players, dealing damage and some knockback. If damage is high enough in the group it is possible to skip these phases altogether. When transitioning into this phase there will be onscreen text stating: "The Thorn Golem is calling forth vines from the Crown of Thorns!".
- The boss may summon Thorn Acolyte adds to assist it in battle.
- Timber: It has a Lethal attack in which its whole body flops to the ground, dealing heavy damage to all targets in front of it. The boss will initially face in the direction of its target and there will be a red arrow tell on the ground for a short time before it falls to the ground.
- Gripping Vines: The boss may grab the target with his aggro with a vine, dealing moderate damage, stunning and grounding the affected player.
Once defeated, it sinks into the ground, forming a portal into the inner sanctum, as well as leaving behind a crystal. Aqualad would collect the crystal and deliver it to Mera as it may be useful.
The Faceless One[]
Note: If there is a Controller in the group debuffing The Faceless One, along with decent damage, the artifact mechanics are optional and the group can focus on damaging and defeating the boss. If there isn't a controller, the group MUST do the artifact mechanics in order to progress through the boss encounter.
Artifact mechanics:[]
There are three artifacts around the room:
Dead King's Sword (south) -[]
- While active, summons multiple images of Dead King's Sword that are mobile and attack you.
- It must be sated by interacting with it, which will hit you for very close to your max health so you must be at full or you will be instantly KO'ed.
- The damage is unaffected by Shield Powers, but using those are still very helpful as it prevents you from falling below your maximum from NPC attacks during the channel.
- When this is active there will be onscreen text stating: "The Faceless One has activated the Dead King's Sword!", followed by: "The Sword demands one life in full to slake its thirst!".
- Additionally there will be onscreen text stating: "The Dead King's Sword is spawning astral projections of itself!", and "The astral projection swords take more damage from other weapons!".
Skull of Triton (west) -[]
- While active, may mind-control players to attack other players (duration reduced by mashing left mouse button, or equivalent).
- It can be destroyed as a normal attackable object.
- When this is active there will be onscreen text stating: "The Faceless One has activated the Skull of Triton!", followed by: "The Skull commands allies to turn on one another!".
- Additionally there will be onscreen text stating: "The Skull's effects can be broken by those with enough skill or by crossing over the Sigil of Protection!".
Shield of Life (east) -[]
- While active, summons invisible Veiled Threat adds.
- Disabled by sacrificing health over time to it, not as dangerous as Dead King's Sword. Must be deactivated four times to permanently disable it. Self-damage unaffected by Shield Powers.
- When this is active there will be onscreen text stating: "The Faceless One has activated the Shield of Life!" - followed by "The Shield requires life essence from willing supplicants!".
You must disable artifacts to prevent them from healing The Faceless One. There will be onscreen text for this at the start of the boss encounter: "Any artifact not currently used by the Faceless One will heal him!".
Other mechanics:[]
The Sigil of Sight (large eye on floor, northwest) turns Veiled Threats into visible Silent School Shades (although they can be damaged normally while invisible).
Onscreen text pop-ups for this:
- "Veiled Shades are being compelled by the Shield to attack!"
- "Invisibile enemies can be revealed by using a Sigil of Sight!"
There is an orange restoration barrel just north of it.
The Sigil of Summoning in southwest binds some enemy golems to you, fighting for your team instead. There will be an onscreen tip stating: "Use the Sigil of Summoning to bind guardians to your will!".
The Faceless One himself fights with Hand Blast, summons Silent School mages, and has a number of special attacks:
- Bolt Barrage: A rapid-fire barrage of projectiles, targeted at one player.
- Call of the Deep: Rarely used, but deals extreme damage to all players.
- Cosmic Energy: The Faceless One will periodically teleport from one part of the map to another player. On both occasions he will leave a cosmic AOE on the floor when he is about to teleport, and when he spawns at his destination he will spawn another cosmic AOE. These AOEs will be temporary but may deal damage over time.
- The boss has various other projectile attacks, such as Soul Barrage and Soul Bolt. These do moderate damage to the affected player.
- Guilty Verdict: One player will receive a curse with a blue water proximity marker. They will take damage over time and deal damage over time to other players close by. This can be cleansed by going to a sigil. There will be onscreen text when this occurs stating: "Those afflicted by the Curse can banish it with a sigil!".
- Later in the boss fight, The Faceless One may summon Silent School Acolyte adds to assist him in battle. There will be onscreen text when this occurs, stating: "The Faceless One calls upon his students to redeem themselves!". Other adds may also join, such as Zodiac Magus, Crustacean Guardian, or Lesser Eye of Gemini.
- Gripping Vines: The boss may grab the target with his aggro with a vine, dealing moderate damage, stunning and grounding the affected player.
Once you have defeated The Faceless One you have completed the alert.
Rewards[]
- Source Marks, Loot Items
- 1 Catalyst (Augments)
- Atlantis: Treasure Box (members/owners only)
Collectibles[]
Briefings and Investigations[]
- Call Me Kaldur (Investigations)
- Heraldry of Atlantis (Briefings)
- Rise of the House of Rath (Investigations)
- The Lost Crystals of Power (Briefings)
Collections[]
- n/a
Feats[]
- Absolutely No Distractions!: During the Atlantis: The Silent School (Normal) Alert, no one can use a gong or Taunt while in Brinehulk form to distract the Crustacean Guardian. (25 Points)
- Artifact Anarchy!: During the Atlantis: The Silent School (Normal) Alert, in the second boss fight, disable each artifact before defeating the Faceless One. (25 Points)
- Artifact Avoidance: During the Atlantis: The Silent School (Normal) Alert, in the second boss fight, defeat the Faceless One without disabling any of the artifacts. (50 Points), grants title: the Astrologer
- Barnacle Blast: During the Atlantis: The Silent School (Normal) Alert, in the Aries Challenge, defeat Barnunculous within 3 seconds after its shield has been fully removed. (25 Points)
- Barnunculous - Roll Out!: During the Atlantis: The Silent School (Normal) Alert, in the Aries Challenge, all members must avoid being hit by the Barnunculous' Barnacle Boulder Roll attack. (25 Points)
- Be My Chum!: During the Atlantis: The Silent School (Normal) Alert, in the Pisces Challenge, defeat each Living Statue while it is standing in the pools of chum. (25 Points)
- Electric Avenue: During the Atlantis: The Silent School (Normal) Alert, in the Pisces Challenge, all members of the party must avoid to be shocked by the eel statues. (25 Points)
- Guardian Golem Galore: During the Atlantis: The Silent School (Normal) Alert, in the second boss fight, summon one of each type of Golem (Barnacle, Coral, Water) in a single run. (10 Points)
- If a Tree Falls: During the Atlantis: The Silent School (Normal) Alert, in the first boss fight, all Thorn Magi must be hit at least once by the Thorn Golem's Timber attack. (25 Points)
- Nobody Burns Me: During the Atlantis: The Silent School (Normal) Alert, in the Gemini Challenge, use proper roles to avoid being burned by the Eye of Gemini pedestal flames in a single run (25 Points), grants title: Seer
- Sick Burn: During the Atlantis: The Silent School (Normal) Alert, in the Gemini Challenge, use incorrect roles to ensure all of Eye of Gemini pedestal flames burn you in a single run. (25 Points)
- Starving Starving Sharks!: During the Atlantis: The Silent School (Normal) Alert, in the Cancer Challenge, destroy the correct Moonstone in under 60 seconds after it is freed from the Cancer Artifact. (25 Points)
- The Eyes Have It: During the Atlantis: The Silent School (Normal) Alert, in the Gemini Challenge, defeat 10 of each color Lesser Eye of Gemini in a single run. (25 Points)
- Timber!: During the Atlantis: The Silent School (Normal) Alert, in the first boss fight, all members must avoid being hit by the Thorn Golem's Timber attack. (25 Points)
- Whack a Barnacle!: During the Atlantis: The Silent School (Normal) Alert, in the Aries Challenge, defeat 20 Barnacle Golems in a single run. (10 Points)
Trivia[]
- In the subtitles, Pisces is misspelt as "Pieces".
- The crystal Aqualad collects is central to Atlantis: Crown of Thorns.
- The Shield of Life and Skull of Triton return in Atlantis: The Throne, being two of the artifacts channelled by Corum Rath, albeit with different effects.
Gallery[]
.jpg "Silent School (1).jpg (223 KB)")
.jpg "Silent School (2).jpg (211 KB)")
.jpg "Silent School (19).jpg (167 KB)")
.jpg "Silent School (17).jpg (297 KB)")
.jpg "Silent School (18).jpg (264 KB)")
.jpg "Silent School (15).jpg (248 KB)")
.jpg "Silent School (12).jpg (241 KB)")
.jpg "Silent School (13).jpg (244 KB)")
.jpg "Silent School (14).jpg (185 KB)")
.jpg "Silent School (3).jpg (218 KB)")
.jpg "Silent School (11).jpg (398 KB)")
.jpg "Silent School (4).jpg (207 KB)")
.jpg "Silent School (5).jpg (199 KB)")
.jpg "Silent School (16).jpg (201 KB)")
.jpg "Silent School (20).jpg (217 KB)")