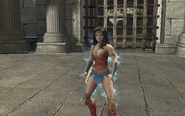
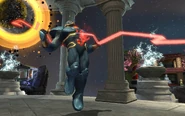
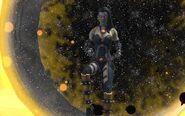
Wonderverse: Fractured God Sphere is a tier 6 raid in the Wonderverse episode. It is also available as elite version.
- Combat Rating: 280
Story[]
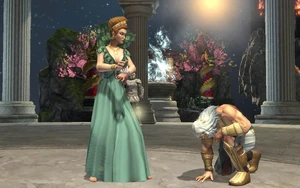
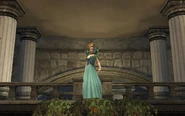
We've learned from Poseidon that the Sphere of the Gods is crumbling and that the Gods themselves have been collecting Source Wall shards to try and repair it. The Council of Wonder Women know that we need those shards to repair the universe. Enter the God Sphere and reclaim the shards. Expect Resistance.
Characters[]
|
The enemy combat rating is 316.
Locations[]
Map[]
Walkthrough[]
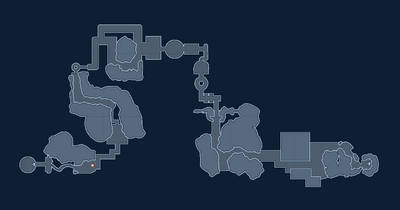
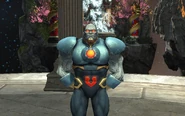
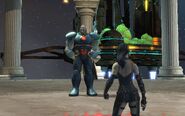
You navigate through a series of hallways resembling previously visited locations, from Kahndaq to New Genesis, Apokolips to Olympus. You fight various add waves. While in the New Genesis area be careful of the Colony Hive Leader. When he does a skull icon above his head he will generate a green field and shield other nearby enemies. Do not damage these as their health will regenerate and it will also reflect damage back at the group at the end of the attack. This can KO a number of players or even cause a wipe if this mechanic isn't adhered.
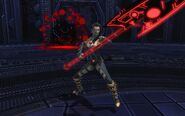
Shortly after traversing from the Underworld area into the Apokolips area you encounter Grail.
First boss: Grail[]
Mechanics:
Mind control mechanic:[]
- Grail may inflict 1-2 players with Mind Control, rendering them unable to control their characters. This may become tricky in the elite version later in the fight when it targets heals or tanks.
- You can free these players with light damage, but be careful not to do heavy damage during this time.
- Be especially careful if you are a Celestial Might DPS, as Plague/Corrupted Divine Light glyphs can be deadly if a mind-controlled player walks into them.
- (If you are heal and have Super-Speed movement mode, using Speed Drain is a good supercharge ability to use on mind-controlled players, and should do the right amount of damage to free them. Make sure to heal those players once they are freed.)
- Try not to free mind-controlled players while they are in line of sight of Grail during her staff slam/throw, or try not to free the mind-controlled players while they are in spinning axes.
- While players are under Mind Control, they will have a red shield around them. If they go near players that are not affected by Mind Control, those players will take moderate damage over time.
Other mechanics:[]
- Blink Attack: Grail may teleport and do a staff slam attack, be sure to stay to the left or right of where she is facing. She will then likely throw her staff (Hammer Throw), this can be stopped by lunging (Hold Square on PS) her. Being in line of sight of this attack as a non-Tank will do heavy damage or probably KO, especially in the elite version.
- Father Box: This will be active throughout the boss encounter, and may spawn red Gravity Well AOE fields. If players are in or near these they will take damage over time and may be crowd controlled and thrown to another area of the room. This may also deal single target damage to an affected player in range (Apokobeam).
- Grail may do a reflect attack - this will be indicated via red text on the screen, a skull icon over Grail's head, and voice over. Do not attack Grail with weapon/powerset abilities during this time as it will reflect damage and knock players away. You may however use an Orbital Strike on Grail while she is doing this for damage out.
- Focused Blast: Grail may have a red skull icon before firing a red omega beam around herself. This will do heavy damage to (perhaps KO) players in melee or perhaps midrange of her.
- Knockback Attack: Grail may surge up in the air and do a slight knock back. During this time her defence will be higher for a short time, so DPS should refrain from using their bigger damage abilities around this time.
- Omega Execute: Grail will prepare an Omega Beam attack, indicated by a Omega symbol timer above her head. Do heavy damage around this time, or she will Omega Beam an affected player with the Omega symbol above their head. In Elite, if the affected player does not have at least one Rank 23 Wonderverse Augment equipped they will be KO'd from this attack. If you pass the damage check, Grail will spawn Omega Orbital Strikes on all players, which should be avoided or those players will take considerable damage.
- Grail may summon Parademon enemies to her side. These should be taken out straight away, and be especially vigilant of Parademon Maniacs as they may attack random group members even if the other Parademons are being kept aggro by the Tank or Tanks. The add spawns usually happen when Grail is damaged down to approximately 80%/60%/40%/20% of her maximum health. (up to 4 add spawns)
- In Elite, Grail will spawn several Summoned Weapon axes which will spin around and follow two players in the group. These do moderate damage over time (and knockback) if a player is in them (Spinning Cleave). The two players will have an arrow above their heads. You should be careful where you place axes, as especially later safe zones will become increasingly limited with add spawns. Be careful not to attack Grail during reflect phases in this case. If you are knocked out under an axe it is very difficult to revive that player so try not to if possible. Having high single target damage on Grail should make the fight go faster and this will be less of a risk to the group.
- It isn't recommended in this fight to use a Supply Drop in the elite version of the raid, apart from early during Grail's reflect phase and early during Grail's Omega Beam damage check (when the omega icon is above her head). If you use a Supply Drop Grail will lunge and use a spinning move on the player that used a Supply Drop, KO'ing any nearby players.
After defeating Grail, the group proceeds through the Apokolips area, defeating any adds on the way. Towards the end of this area there is a room with a large pit in the middle - do not fall down this or it will KO you. Be vigilant of some of the Parademon mobs as they may shoot bombs that knock players back - this may knock players off down the pit to their deaths. After this room, you proceed through a Heaven section followed by a Hell section, defeating more mobs, before making it to the Olympus inspired area. Be vigilant of Olympian Lions here as they can stun and do heavy damage - make sure the tank aggro's these first. After climbing a staircase you arrive at the last boss: Zeus.
Last boss: Zeus[]
First phase:[]
You will fight effigies/statues that in a random order two-by-two start to attack the group. The tank should be vigilant to where each add spawns as there is a shield/dome in the middle of the room which may hinder movement. In the regular version these effigies shouldn't be too threatening. In the elite version:
- Effigy of Athena/Effigy of Ares will have a DPS role icon above their heads, and will debuff DPS close by. If you DPS while close to this effigy you will do very low damage output.
- Effigy of Zeus/Effigy of Aphrodite will have a Tank role icon above their heads, and will debuff tank/s close by. These should be KO'd ASAP, otherwise they are a great danger to the tank and by extension the group as well.
- Effigy of Hades/Effigy of Poseidon will have a Heal role icon above their heads, and will debuff heal/s close by.
- Effigy of Hera/Effigy of Hecate will have a Controller role icon above their heads, and will debuff a controller if it is close by.
Second phase:[]
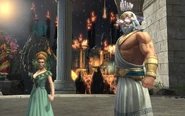
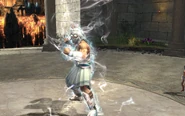
Zeus becomes active in the fight after a minute or so of dialogue.
During this time in (Elite) all players should position properly, with the tank/s in the middle of the room with Zeus, and all other players spread out around the edge of the room in between each pillar. DPS should of course be positioned so they can target Zeus and any add spawns. The healers don't have to be able to target lock enemies the entire time; their priority will be healing the group.
Mechanics:
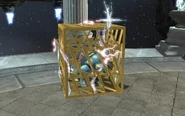
Cage mechanic:[]
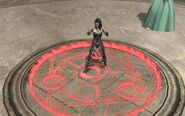
- Some players will get caged (Source Cage). There will be a small white electrical animation under the feet of players who are going to be affected by this.
- Once players are encased in a Source Cage and while they are caged, they will take mild to moderate damage over time.
- In the regular version, you should avoid breaking out at too close a time to another player, as when you break out of a cage you will do raid wide AOE damage to other players. With overlapping cage breakouts this can lead to KOs so be careful.
- In elite you will have to have a set order/timing of when players should break out. The typical group setup for this boss fight in the elite version will be 1 tank, 2 heals, 1 controller and 4 DPS. In this case, the tank should breakout first as the tank will have the aggro of Zeus and any add spawns that may appear. The heal will be next priority. Then the DPS, then the Controller.
- Ideally the DPS should have a damage over time attack in their load out (or Brawling weapon mastery if you are a precision DPS) that can free the tank quickly without risking Zeus aggro'ing the rest of the group and causing unnecessary KOs.
- If you have 2 tanks then heal is the main priority to break out first as they will need to heal the group while the other cage breakouts are going on. Do not break out at the same time as another player as the overlapping AOE damage on the group may lead to KOs. Voice chat might be helpful if players are new to this boss fight in the elite version.
- If you are caged too close to someone else who is also caged (either another player or Wonder Woman NPC), you will take additional damage over time (displayed as Gravity Well in the combat log). This is more likely in the elite version but not exclusively.
Other mechanics:[]
- Source Storm: There will be 4 source storms rotating around the map at the start of every cage phase for a time. They won't be active all the time during second phase, but avoid them. In the elite version most of the group should be positioned around the edge of the boss room. Also during the last phase there will be an additional source storm in the middle of the room as well so whoever is in the middle of the room (ie. the tank) should be vigilant of this. In the last phase the source storms will continue to move around the room without stopping until the fight is over.
- (Elite only) Catastrophic Source Overload: Often during the cage phase (but not always), one player will start getting bigger, and will do so 3 times. The animation will interrupt your powerset rotation. It is highly recommended that before the 3rd animation that you block (hold R1 on PS to block), as the 3rd animation will do large damage to you. Make sure you aren't near other players while you have this mechanic.
- (Elite only) Random players may get an electrical AOE underneath them - usually players closer to Zeus but not always. Move out of the way of this AOE but don't go too close to other players as you may do large damage to them during the time this AOE is active (Arc Lightning). This often happens in between the cage phase and Zeus' lunge phase.
- At approximately 80%/60%/40%/20% of Zeus' health, adds will spawn. KO these as soon as possible while managing other mechanics, and ensure the tank has aggro of all mobs as they may attack nearby players instead.
- Sometime after the cage phase has ended, Zeus will prepare a powerful attack (shown by an electric icon and timer above his head). If group members lunge this several times it will stop the attack, however if not Zeus will become invulnerable for a short period and do a powerful raidwide AOE attack (Omega Source Blast) (indicated by a red skull icon above his head). Players should block this (being cautious of other mechanics ongoing) and heals should have burst heals at the ready especially in the elite version. After this source storms will re-appear again and another cage phase will commence.
- It isn't recommended throughout this fight to use an Orbital on Zeus in the elite version, apart from early during the lunge phase when Zeus has the electric icon and timer above his head. This is best reserved for when there are add spawns. If you orbital Zeus otherwise during the fight, he will spawn white lightning orbitals on all players on the group. Avoid these immediately or they will KO.
- Ground Pound: Zeus may occasionally do a shockwave, dealing damage to nearby players and knocking them back.
Last phase:[]
Once Zeus is at approximately 15% health he will restore to approximately 45% health and knock everyone back (Ground Pound). Make sure you are positioned in a way that doesn't get you knocked back into a Source Storm if they are active at the time, or you may get KO'd during the cutscene after. After a brief cutscene the Wonder Woman allies will spawn and join the fight at your side.
Phase is similar to second phase except with a few differences:
- Source storms continue throughout, and in elite a source storm also appears in the middle of the room.
- There is no lunge phase or add spawns
Wonder Woman/group members cage mechanic notes/considerations:[]
- Cage phases and the 'big' mechanic become more frequent.
- Zeus' defence is higher in this phase, however the Wonder Womans will debuff his defence if they aren't caged or knocked out.
- Players should ensure the Wonder Woman allies are alive and free them from a cage if they get caged so they can debuff Zeus.
- Ensure that you free any Wonder Women from a cage when other players in the group aren't caged themselves, otherwise (more so in elite) it may become tricky with overlapping cage breakout AOE damage and may lead to players being KO'd.
- Also note that cage breakout AOE damage can in itself do damage to other cages that players/Wonder Women are trapped in, so this may breakout those players at unplanned moments and lead to further raid wide AOE damage, again more in elite.
- Make sure you don't make a habit of overlapping cage breakout damage, and that your heal/s are at their best healing the incoming damage.
- When a Wonder Woman ally NPC gets broken out of their cage, on the combat log it will display the damage dealt to the group during cage breakout as Gravity Well. This is likely meant to be displayed as Source Cage.
Once you have defeated Zeus you have finished the boss fight and the raid.
Rewards[]
- 10 Source Marks, Loot Items
- 1 Catalyst (Augments)
Collectibles[]
Briefings and Investigations[]
Collections[]
- n/a
Feats[]
- Ambrosia Non Grata: In the Wonderverse: Fractured God Sphere Raid (Normal Only), have no one use Athena's Ambrosia in the fight against Grail (25 Points)
- Bug Zapper: In the Wonderverse: Fractured God Sphere Raid (Normal Only), defeat Colony Hive Leader 25 times in the New Genesis section (25 Points), grants title: Zapper
- Danced With Death: In the Wonderverse: Fractured God Sphere Raid (Normal Only), during the fight against Grail, have no one have no one in the Raid group get knocked out (25 Points), grants title: New God
- Even Gods Tremble: In the Wonderverse: Fractured God Sphere Raid (Normal or Elite), prevent Zeus from doing his Omega Source Blast attack (25 Points)
- Exposure to the Omega: In the Wonderverse: Fractured God Sphere Raid (Normal Only), never interrupt Grail while she powers up her Omega Beam Execute (25 Points)
- Fire Bad: In the Wonderverse: Fractured God Sphere Raid (Normal or Elite), have no one in the group fall and get knocked out in the Fire Pit room of the Apokolips section (25 Points)
- Fly Swatter: In the Wonderverse: Fractured God Sphere Raid (Event and Normal Only), defeat Colony Hive Leader one time in the New Genesis section (10 Points)
- Hephaestus' Lightning Rod: In the Wonderverse: Fractured God Sphere Raid (Normal or Elite), do not prevent Zeus from doing his Omega Source Blast (50 Points)
- Look Hera, No Shield!: In the Wonderverse: Fractured God Sphere Raid (Normal or Elite), don't touch or get hit by Zeus' Source Storms (25 Points)
- Source of the Power: In the Wonderverse: Fractured God Sphere Raid (Normal Only), during the fight against Zeus, have no one in the Raid group get knocked out (25 Points), grants title: Old God
- Stay of Omega Beam Execution: In the Wonderverse: Fractured God Sphere Raid (Normal Only), never allow Grail to use her Omega Beam Execute attack (25 Points)
- Stone Breaker: In the Wonderverse: Fractured God Sphere Raid (Normal Only), defeat all of the Effigy statues in under 2 minutes during the Zeus fight (25 Points)
- Together As One: In the Wonderverse: Fractured God Sphere Raid (Normal Only), ensure that each of the Wonder Women from the Council are never knocked out (25 Points)
Elite
- Bathing in the Omega: In the Wonderverse: Fractured God Sphere Raid (Elite Only), never interrupt Grail while she powers up her Omega Beam Execute (50 Points)
- Death Blossom: In the Wonderverse: Fractured God Sphere Raid (Elite Only), have no one trigger and choke on the Flower Traps in the New Genesis section. (50 Points)
- Destructor of Marble: In the Wonderverse: Fractured God Sphere Raid (Elite Only), do not allow more than 4 Effigy statues to be out at the same time (50 Points)
- God-of-Death Defying: In the Wonderverse: Fractured God Sphere Raid (Elite Only), have no one get knocked out for the entire Raid (50 Points)
- Holy Grail!: In the Wonderverse: Fractured God Sphere Raid (Elite Only), during the fight against Grail, have no one in the Raid group get knocked out (50 Points)
- Omega-level Pardon: In the Wonderverse: Fractured God Sphere Raid (Elite Only), never allow Grail to use her Omega Beam Execute attack (25 Points)
- Raaaaid!!: In the Wonderverse: Fractured God Sphere Raid (Elite Only), defeat the Colony Hive Leader 50 times in the New Genesis section (50 Points)
- Source Mastery: In the Wonderverse: Fractured God Sphere Raid (Elite Only), during the fight against Zeus, have no one in the Raid group get knocked out (50 Points)

